Wednesday, July 3, 2013

It's been a while, I'm back.

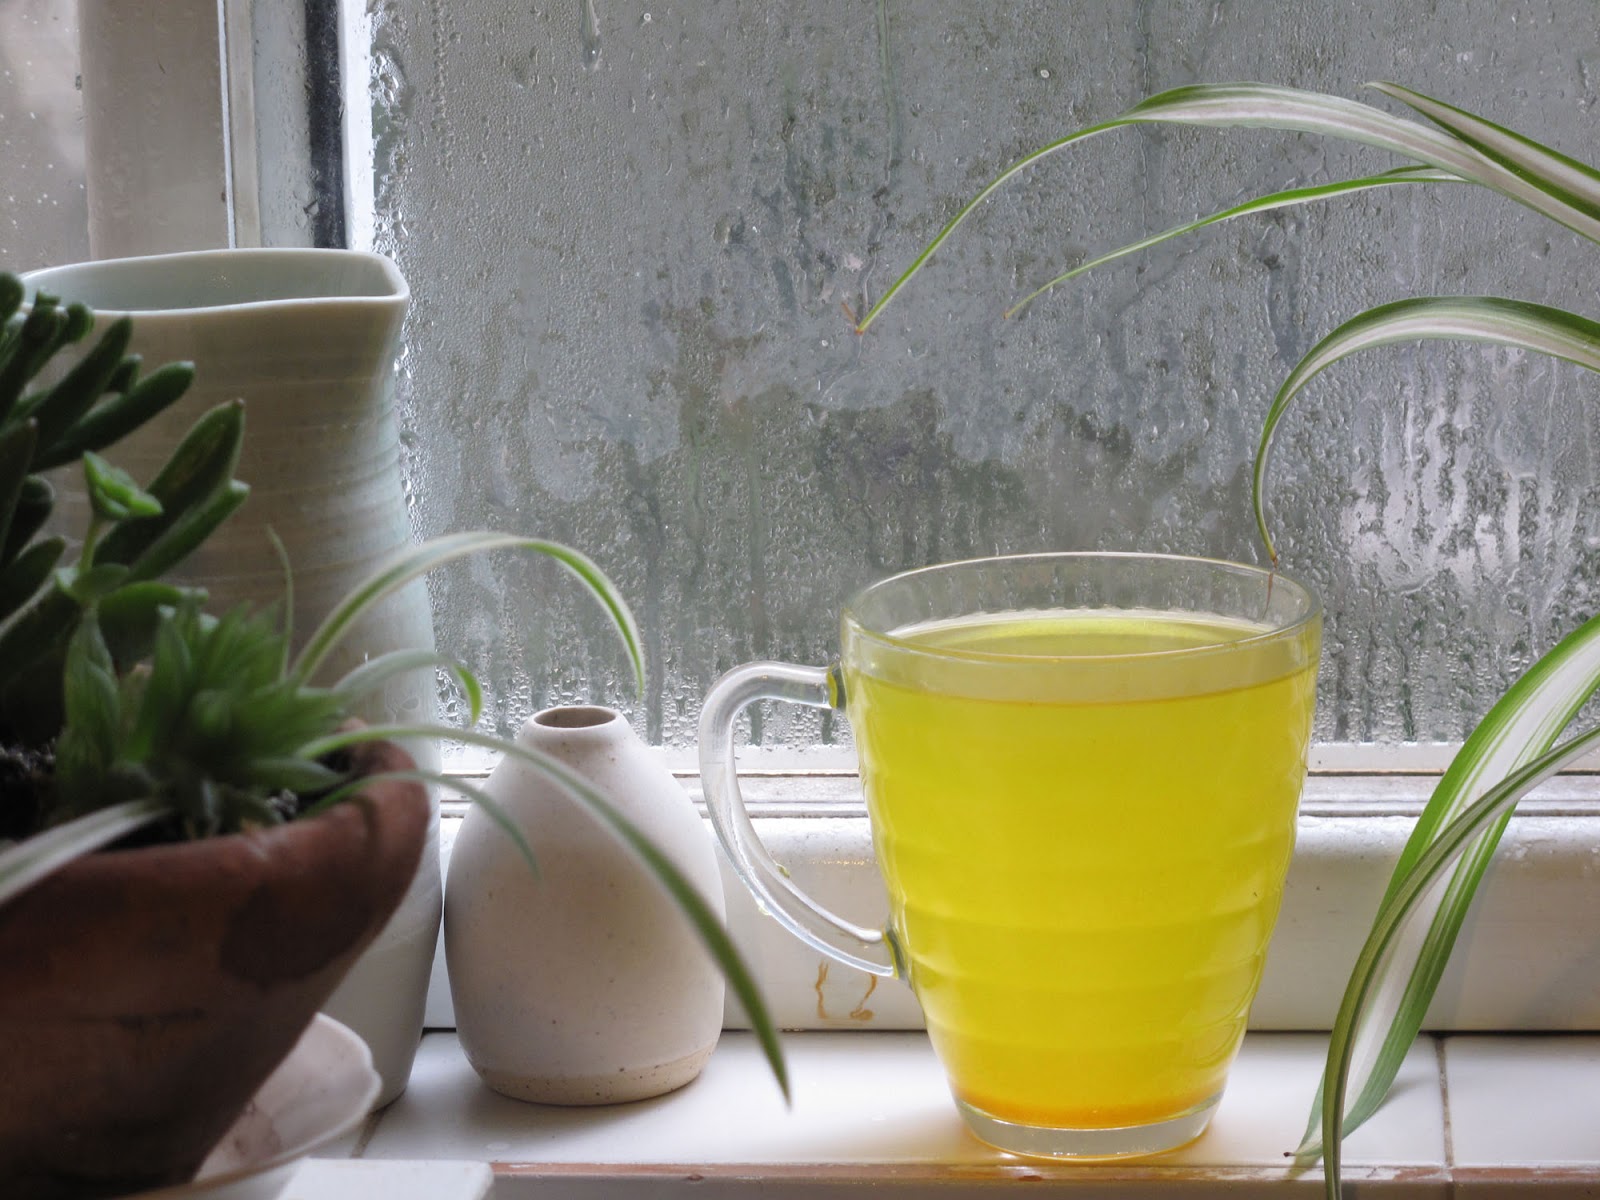
Well. No fireworks and bangs. Just like that, simply and quietly- I'm back. Hello there!  It has been nearly 
half a year since I last visited this place, and time went by quickly. Where have I been? Many of the same places. A couple of new ones as well. Sometimes busy, sometimes less so. For the most part, life has carried  on in its normal, ongoing pace, that is- at times flowing rapidly, at others dripping slowly drop by drop, but all in all, I have absolutely no complaints.


On the contrary. But I missed you. I missed sharing recipes, and thoughts of food and other yummy things with you. Needless to say, much food has been cooked over the past six months. Several dishes even yielded an excited  "I MUST put this one on the blog!!!" categorization in my little brain, and so photos were taken and recipes scribbled down, and perhaps the time might come to share some of what has been cooking.
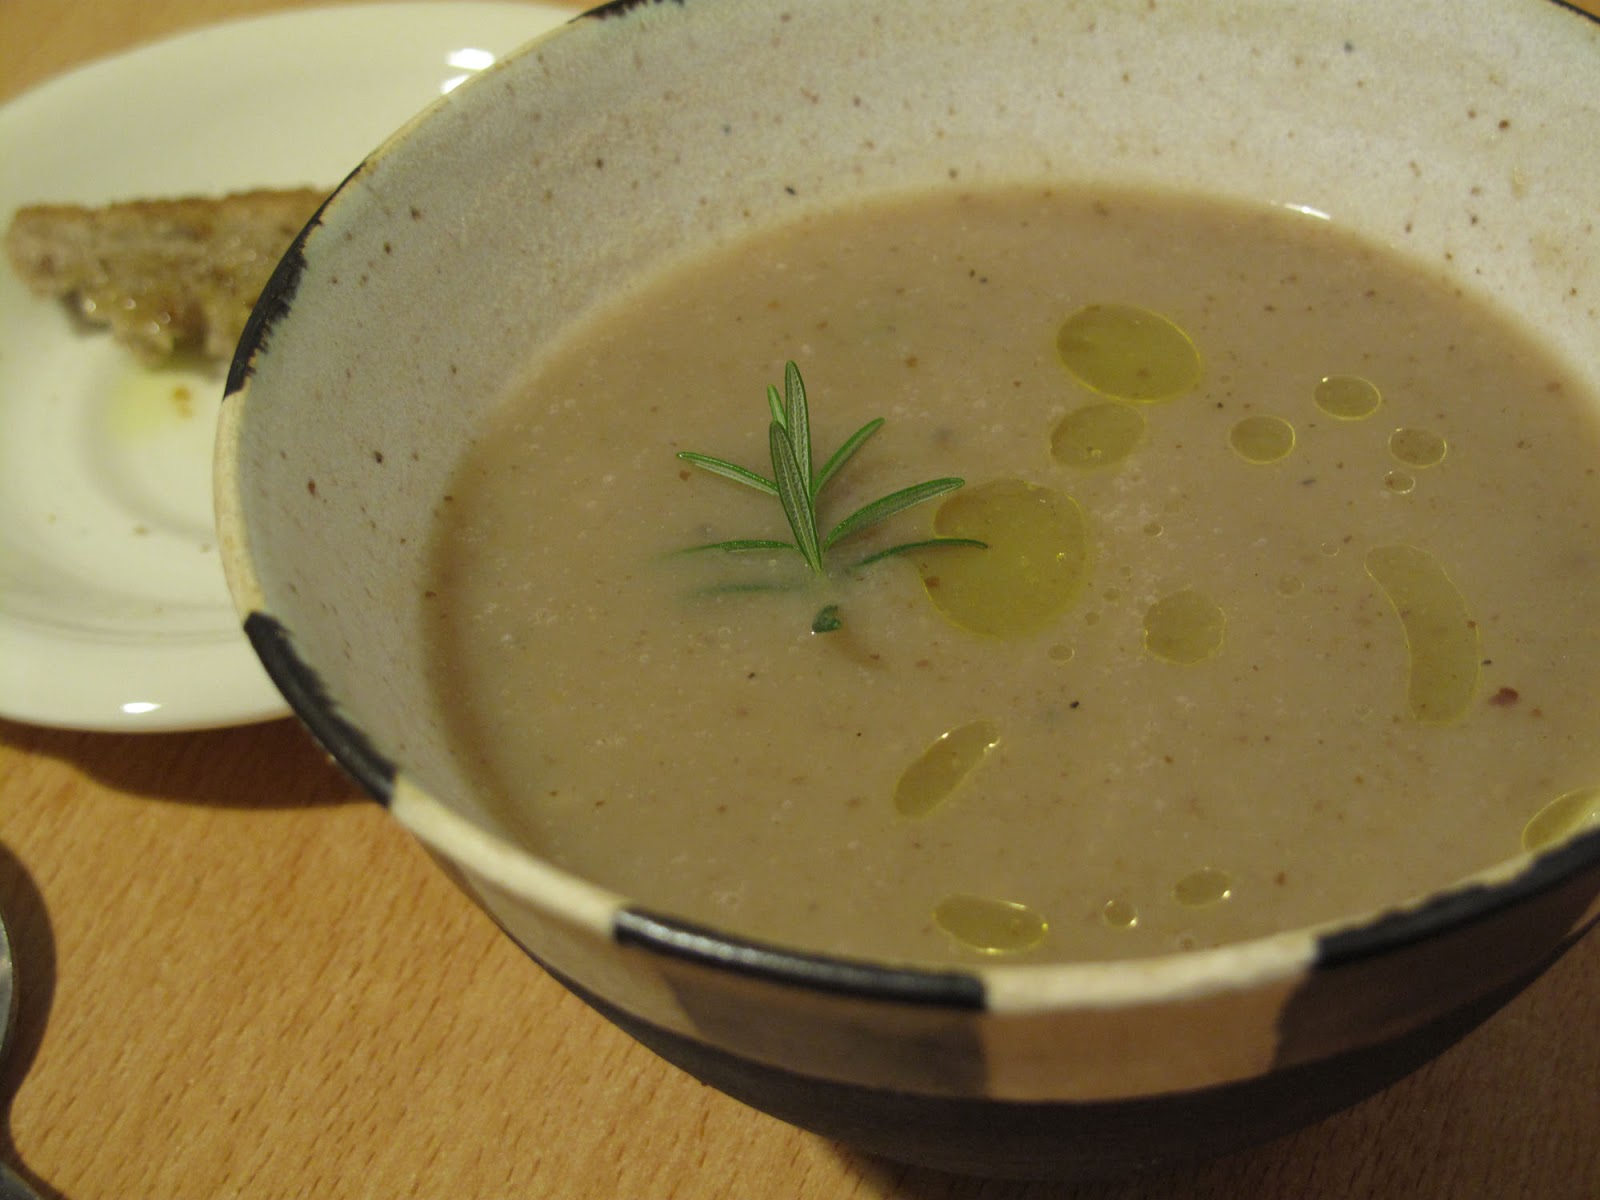
 But to start, I'm making lentil soup. Right now, that is. A pot of red, tangy, warmly spiced lentils are bubbling away on the stove behind me as I type. My friend Yonatan made this soup last week and brought it in to the studio, where he folds wonderful Origami creations, I throw pots, and the both of us share the  thrills and delights of two avid food lovers with each other, gushing over what each of us cooked and turned out "Amazing!!!". So, Yonatan kindly invited me to a cup of soup, and that soup in return got me excited. I asked him to share the recipe and he happily and generously agreed, describing the ingredients he gathered into this particular soup  with the eager excitement that only a true food lover could feel towards carrots and the like. And so, I'm not even waiting for the soup to be ready to begin writing this one. I added a little tweaks of my own in the shape of smoked paprika and lemon juice, just so I could get a creative. It was delicious without them as well. I know it will be good, I just know it. Trust me on this one.


Yonatan's Red Lentil and Coriander Seed Soup

1.5 cups red lentils*, soaked over night
2 medium onions, diced
1 large carrot, diced
3 garlic cloves, sliced
2 celery stalks, leaves coarsely chopped and set aside, stalks diced
1/2 tsp coriander seeds, lightly crushed 
1/2 tsp ground cumin
1/2 tsp smoked paprika
2 tbsps tomato paste
3 tbsp olive oil
small bunch of cilantro, chopped
pinch of cayenne pepper
a squeeze of lemon juice

In a large pot warm olive oil, add onions and saute for several minutes, stirring occasionally. just before they begin to turn golden add carrots, garlic and coriander seeds- I used a mortar and pestle to slightly crush mine, but you could try spreading them over the chopping block and rolling a rolling pin firmly over them. Cook for several more minutes, then add the diced celery stalks. After 2-3 more minutes add the soaked lentils, cumin and paprika, stir well and cook, again for several minutes, careful not to let the bottom layer burn. cover with water- around 1.5 liters I'd say, add the tomato paste and stir in till dissolved. cover and bring to a boil. Reduce heat and let cook till lentils are completely tender. At this point add salt, cilantro, a pinch of cayenne pepper ( or more, if you like more heat ) and a little bit of lemon juice- you don't want the lemon to overpower the flavours, but to be more of a subtle hint. 
Serve with a bit of olive oil drizzled on top. Yum.

* A word or two ( or a very long paragraph ) about red lentils. For the most part, the red lentils I've used cook up extremely quickly and in fact loose their shape almost instantly, resulting in rich, porridge-like dishes- perfect for Dahl. On close examination the red lentils that seem to be the most common around here are all split, and so cannot sprout, although I still prefer to soak them, whether out of habit or of hopes that the soaking still eases digestion in this case as well. However, I managed to lay my hands on some super-star gorgeous un-split red lentils for this soup, at an Ethiopian shop at the market. The Ethiopian stores at Mahane Yehuda all have an exceptional range of legumes, and although I seriously doubt there is any chance of them being organic- they certainly are of very fine quality. I was surprised to discover that the un-split red lentils held there shape nearly perfectly even when completely tender, and so the soup I made tonight was more brothy and less stewy than Yonatan's version. If you want a richer textured soup, either use the split version of red lentils or simply blend a portion of this soup and add it back into the pot. In any case, the soup I made tonight turned out glorious. Some things we just know. 


XOXOXO 


Thursday, January 10, 2013

General Winter

Hello there. We have been experiencing one of the rainiest, wintriest weeks in years, and in a generally mild climated country such as our own I bet you can just imagine the amount of excitement, sentiment and plain out hysteria this might stir. The amount of words poured over this wintry spell in every possible sphere- media, facebook, private conversations-  threatens to exceed the precipitation counts themselves, and it was a pretty fair downpour, I'll admit to that.
So, the last few days have turned me from a not-especially-avid weather report follower into a near zealous weather report shunner, and all for the sake of maintaining a sense of surprise and wonder in life. And proportion, one might add. As far as I'm concerned, once one has noticed the seasons have changed one is obliged to change their wardrobes, shifting the necessary garments up or down in the closet accordingly. Layering should be applied so as to allow the peeling off or piling on of garments as necessary, and if it has been pretty cold for a few days in a row- one might rightfully determine to opt for the heavier coat when leaving the house. It's common sense, no? If the need arises for some planning in advance, by all means, consult the evening news to learn if tomorrow will require an umbrella. But to religiously try and determine just how much rain will fall in every individual back yard? hey, you lost me there. I'll take a general  "actual chance for snow" instead of a knowledgeable declaration of just how many centimeters to expect, and then relish the white cover I wake up to, thank you very much. Which was of the depth of 10 cm, mind you. We measured.


I would like to share several wintry recipes with you. The first is for a tea, a drink that becomes a staple for me in winter. I am constantly boiling, steeping, and sipping it seems, hot mug clenched fast between palms. I juggle between a variety of ready mixtures, and an array of fresh and dried herbs and spices which I mix and much according to need and desire. Warming spices are especially appropriate once the temperatures drop: Cinnamon, cloves, ginger ( fresh and in dry powdered form ), english and cayenne pepper. All of this have therapeutic qualities which are relevant for a host of winter conditions. Starting the morning with a cup of tea made from boiling water poured over about a 1/4 of a teaspoon each of cinnamon and ginger in their powdered forms, along with a pinch of cayenne pepper is wonderfully delicious, and it is very quick and simple to prepare since no peeling, dicing or lengthy boiling of roots of barks is required. A warm cup of water with freshly squeezed lemon juice and a pinch of cayenne is good when I feel groggy or lethargic, and is said to be highly cleansing to the body. Given how hot cayenne pepper is, I find it easy to believe it's reported germ killing qualities. I can only handle a pinch.


The tea I'd like to share with you is one I discovered last winter when I was down with a cold and turned to again this week when I was feeling under the weather (oh, weather again. apologies). Turmeric may not be the most obvious candidate for tea making and the thought of it may even make you shun. It's worth a try though, as it is said to posses anti-inflammatory and antioxidant qualities and is enjoyed regularly by several healthful and long-living communities around the world, mostly in Asia. You can read about it's properties here, and there is plenty more info out there on the web. The flavour takes some getting used to, but accompanied with ginger, lemon and possibly some sweetener ( natural! duh. )  may even be something you'll learn to like. I quite enjoy it now, and it makes me feel great.


Turmeric Tea
*
4 cups of water
1 tsp ground turmeric
1 tsp powdered ginger OR 1 cm long piece of fresh root, peeled and diced as tiny as possible
juice of about a 1/4 of a lemon
pinch of cayenne pepper ( optional)

in a lidded pot bring water to boil. Add turmeric, lower heat and simmer covered for 8 minutes. add ginger and cayenne and simmer for several more minutes ( if you are using powdered ginger you can add it in earlier on). Remove from heat, add lemon. You may want to sweeten this with honey, brown sugar, maple syrup or just have it plain. 
I added the cayenne in this case since I was overcoming a cold, and wanted extra germ killing qualities in my tea. I often make this tea with only turmeric, ginger and lemon. 

The next recipe was a chance discovery, also prompted by the cold, as in, the sickness type one. After a day of mostly tea I needed an easy and nourishing meal and seeing as I had zero inclination towards a lengthy preparation I decided to attempt an Asian style broth with soba noodles. My expectation were minimal to say the least, but the effort was rewarded with a quite delicious bowl of soup which I will most definitely be re-making and elaborating on.


Shiitake Broth with Soba Noodles
6 cups of water
2 dried shiitake mushrooms
1.5 long piece of ginger, peeled and finely diced
1 clove of garlic, halved
2-3 tbsps Tamari soy sauce
2 tbsps Sake
1 tsp brown sugar
a bit of rice vinegar
1 small carrot, sliced into thin, long pieces
1-2 scallions, chopped into 2 cm long pieces
1/3 of a package of Soba Noodles.
1/2 a package firm tofu, cubed 

In a lidded pot, place water, ginger, garlic, mushrooms, soy sauce, sake, sugar and vinegar and bring to boil. Reduce heat and simmer covered for about 15 minutes. Add carrot, tofu and noodles, and cook till noodles are just about ready, then add scallions and continue cooking till noodles are done. Check seasoning and serve.
I realize Sake is not something people normally have lying around, but I happened to have some in my fridge for a while now. I thought of using it since I haven't been able to find a high quality Mirin, a Japanese condiment made of rice but less alcoholic than Sake,and sweeter. In any case, the Sake was perfect here. Garlic, Shiitake and Ginger are all reported immune boosters and thus seem a likely combination for a vegetarian "chicken soup" which doctors often order to treat a cold. I also found that despite my fears Soba  noodles  hold together quite well in leftover soup and don't become overly soggy and mushy, thus making it possible to cook the noodles along with soup and store any leftovers. It was delicious the next day, possibly even better.


That's it for now. I still have a soup recipe that I owe you, but I think we shall save it ( once more for next time). This post is already a little word-heavy, and I do not want to weary you. Keep warm, dry and well fed!


Tuesday, January 1, 2013

Fuss Less: Mung Beans with Spinach and Lemony Tehina

This here is a dish I came up with a while back while trying to think of tasty,simple and fast ways to incorporate more legumes into my diet. Vegetarians need legumes, and if you are a puritan such as my self, legumes need care and some planning in advance: I prefer using dry beans, lentils and the sort, which require an over night soak and in many cases ( lentils and several others being the exception to this rule ) a lengthy cooking. I never used to cook a big batch and freeze part of it for fear of harmful chemicals the plastic containers would leach into the  food, and of loss of nutrients. However, I have found that my semi-religious attitude was preventing me from eating the amount of legumes which I should be eating, and thus proving unfavorable. So, I am trying to adopt a more relaxed attitude: maybe it's better to have a couple of boxes of cooked chickpeas or beans hanging around in the freezer than to skip this healthful, tasty part of my diet all together. Of course I prefer to soak, cook and eat my legumes immediately, but this just isn't always possible. I will just have to evolve, then.


This dish demonstrates the metamorphosis perfectly. I soaked a cup of Mung Beans over night. The next morning, I had neither time nor and inclination to cook them. So I changed their water and let them soak some more: this can only do them good. As the seed absorbs water it comes to life and begins to germinate, making the nutrients held within it more readily available for our bodies. But by the evening, it was time to either go ahead and cook those babies, or let them sprout. I felt like doing neither. Rather then reproaching myself for my lack of conviction, indifference towards my health and plain darned laziness, I somehow managed to shut that inner censor off and put those poor little beans in a pot on the stove. I shall cook them, refrigerate them, and figure out what to do with them next, as the week unfolds.
What a happy decision. Some of my most satisfying meals have been made from what I thought to be an empty fridge, and a gathering of random products which didn't stir  in me much enthusiasm nor even  half a hope of putting together a decent meal. But they repay my efforts, and forgive my lack of smallness of faith, and arrange themselves into something magical. . What  I would have been  missing out on if I had shut the refrigerator door at the sight of that box of plain cooked beans and several lonesome tomatoes and stomped off grudgingly to the nearest cafe, tail between feet!  I resolve whole heartedly, religiously, to never again dismiss what's lying in front of me, but instead to pick it up and pay it a second thought, see if it isn't in fact something lovely.  I know I shall not always succeed in doing so: looking, seeing or making the best out of what's in front of me. But I will try.


Mung Beans with Spinach and Lemony Tehina 

1 cup mung beans, soaked for at least 8 hours
6 ripe tomatoes, peeled and cut into 8ths
2 medium red onions, thinly sliced
4 cloves of garlic, thinly sliced
1 very large bunch of fresh spinach, rinsed
1/2 tsp ground cumin
1/4 tsp ground cayenne pepper 
several tbsp olive oil

* As you can see in the photos, I made this once with spinach and once with swiss chard. Both were delicious, you can choose which ever you like or have on hand.

Cook mung beans in plenty of un-salted water till soft, but not crumbly. strain the beans from water and set aside. I a large skillet, warm olive oil. Add onion and garlic and cook till onions just begin to turn gold, but are still crisp. add tomatoes, cook for a few minutes, then add mung beans and spices. Cover, lower flame, and cook till tomatoes create a sauce. Add spinach and cook just till the leaves wilt. Add salt. Serve with a lemony, thin tehina sauce which you have made by mixing tehina with plenty of lemon juice, salt and quite a bit of water- you want it sour and on the runny side, like a thick cream. This dish is good either on its own, or you could pair it with rice, or baked sweet potatoes.. or whatever suits your fancy.


Saturday, December 29, 2012

Jerusalem,Artichoke.

I have noticed  lately that  a week rarely goes by without a pot of soup. As soon as the temperatures began to drop I found myself planning my cooking endeavours more and more around one crucial question: which soup will I be making. Once that is decided, I can turn my thoughts to what might accompany that soup well.
There have been a couple of these such soups lately which I think are worth re-making, and for that matter,  sharing. One was a Chickpea, Leek and Tomato Soup, thick and rich with chunks of vegetables in a fragrant broth.We will save that on for later though, since the second soup requires Jerusalem Artichoke, which is only available during the fleeting winter months here in Israel, and thus commands our immediate attention and quickness of action.


The Jerusalem Artichoke is a mildly flavored tuber which has no relation to a true artichoke, or globe artichoke, as one is formally known. Instead, the Jerusalem artichoke is related to the sunflower, and I am not certain what it's connection to Jerusalem is exactly. Seeing as I have a tender spot in my heart for this city which I live in and which lent this root its name, one may begin to imagine a certain bias and the sense of curiosity I hold for this awkward looking vegetable. Any recipe I have stumbled upon which called for it seemed to have an air of class and sophistication to it, yet I believe I only attempted cooking with it once before, several years ago.
But this winter,  when these funny looking roots started appearing heaped in small piles on the market stalls, I heard their beckoning once more, and I yielded. Some quick research on the net for inspiration led to a plan:
I shall team them with a host of fine tasting roots, roasted chestnuts and nutmeg in a rich, creamy soup. I brought home a kilo of them, patiently toiled over their peeling, lovingly cut them and the rest of the roots into equally sized cubes, and sauteed the lot in butter with spices. A fresh branch of sage and a bit of white wine summed things up nicely and made for quite a luxury of a soup. This was about a month ago, and the soup was well received by those who shared it with me over a Jerusalem saturday.


Yesterday I made this soup for my family at my father's home, with slight variations. Again, it was deemed a crowd pleaser. Here is the recipe, I hope you lay your hands on some of these little funny gems and try it yourself. I think you'll be happy once you have.

Jerusalem Artichoke Soup with Roasted Chestnuts
***
1 kg Jerusalem Artichokes, peeled, cut into pieces about 2 cm wide
1/2 kg potatoes, peeled
1 large celery root, peeled
1 medium onion, white or red
6-8 cloves of garlic
300 gr roasted and peeled chestnuts
several leaves of fresh sage
ground nutmeg
black pepper
salt
3 tbsp of butter, or olive oil
a generous splash of dry white wine
*


First off, a few words of advice and generals guidelines. Before you set to peeling your Jerusalem artichokes, please supply yourself with ample amounts of patience. Their odd shape and many protrusions make them a less then perfect candidate for peeling, but still those peels must go. I use a veggie peeler and a small Sharp knife to reach spots which are more tricky. To make things easier, try and choose tubers which are relatively uniform and shape. Also, look for ones that still look juicy and firm, not dried out or woody. Once peeled, their flesh resembles that of an uncooked potato, watery and crisp. It's worth it, really! Plus, if you happen to be in the right kind of mood, tending to them can be meditative. If you are feeling edgy and impatient, save this soup for the next day. 
You should also try and cook all the roots into similarly sized pieces, so they will softened about the same time.
I used bagged chestnuts, which made the matter much easier. If you have the time and are so inclined, you could roast and peel your own.

In a large pot, warm butter or olive oil over a medium flame. Add garlic and onion, and saute for several minutes. Add the rest of the vegetables and season with salt, pepper and nutmeg ( I used about 1/2 a tsp, and more at the end, but use as much or little as you like ), stir, cover and saute till the vegetables are soft, stirring occasionally to prevent browning. Add chestnuts and sage, cover with 2 liters of water, bring to a boil, reduce heat and let simmer till vegetables are soft. Add a splash of white wine, check seasoning, and serve. 
The second time I made this I used olive oil instead of butter, and left out the wine since I had none on hand. Both versions were excellent. The soup is rich regardless of whether you use butter or not, although it was somewhat richer with the butter, naturally. I would recommend the wine if you have it, because it compliments the delicate flavours of the soup perfectly. Although, the soup is still very, very good without it as well.


Happy winter, keep warm and cozy, and have a wonderful, beautiful new year!


Monday, December 3, 2012

Make It: my worm bin!!!

I am extremely happy to introduce my new pets: red wrigglers. Yep. Some girls get excited about frilly dresses, some girls like to dig up worms. I like both! lucky me.
For a very very very long time I have been dreaming of starting a worm compost bin- we all have our peculiarities. These little fellows gobble up organic matter and transform it into a nutrient rich substance which plants thrive on. Less garbage, free fertilizer for my house plants and a "do it yourself" sustainable appeal? you've got me. 

Temporary worm bin, with a warning for un-expecting flatmates ,or guests.


That said, this dream was one I kept at the back of the drawer for a particularly long time. Fear of failure was daunting. I had to do it "right": the perfect bin, the perfect location, the perfect worms, perfectly decomposed compost as a final goal- all the right kind of expectations to keep oneself from trying something new. But as luck had it, a week and a half ago I saw a notice for a short Vermicomposting ( that's worm composting in fancy-tongue, mind you) workshop to be held 5 minutes from my home. Before I had a chance to persuade myself to wait any longer, I was signed up. Before I could decide to "wait" till I have a bin set up for my new buddies and then buy the worms, I went out to the market and found a lovely plastic box with a lid which had been used for cheese- free, and plenty more where it came from. And so, a week ago, song in heart and clumsily large container in hand, I made my way jubilantly to the garden of the Vegetarian Society near my home. I listened and learned, and found that I had all that I need to give it a shot. The worms came home with me the very same evening, and were placed in their temporary home to wait for some final adjustments to be made to their permanent abode.

The new worm bin, empty, by the bin that housed the worms over the past weeks. Worms don't like light, or dry hands, so I wet my hands to handle this one and get a quick shot of it. Sorry, wormie. 


Since the the bins I found are a little on the small side, the instructor suggested I try a vertical method of composting. To start, you need two bins. The bottom one has a few large holes in its bottom to drain of liquid- a nutritious fertilizer that can be diluted and fed to potted plants. I have been buying this stuff to feed my house plants, who thrive on it. I look forward with much hope to producing my own! into this box is fitted a second box, into the bottom of which plenty of holes have been drilled, to make for good drainage. The lid should also have plenty of holes to allow circulation of air in the bin. The bin is situated on two bricks, with a slight slant towards the side of the bin where the drainage holes for collecting the liquid are- under which you should place a small container. 

Left to right: The green bin is the inner one, in which worms, bedding and food scraps are placed. The green bin sits in the white one, which has three holes for drainage and collecting liquid fertilizer. lid and bottom of green box have plenty of holes for drainage and aeration. A layer of leaves, above a layer of shredded newspaper, under which worms hide in their bedding with food scraps. It is important to maintain humidity in the bin. The bin on two bricks under the table, slanting slightly forwards towards drainage holes of white box. There is a small container underneath these holes to catch liquid.  I hope to eventually move the bin underneath the sink, for now it will stay here, so I can keep track and see if things are working.

And then the wormies moved in! first I put down a layer of shredded newspaper. The worms I got came with some soil and quite a bit of yet to be fully eaten kitchen waste, so for now I only added a few cabbage leaves- I don't want to over feed them, which could kill them, so I'm waiting for them to get settled in and finish their last meal before giving them more food.
I have a few goals with this experiment. Obviously, I would like to make compost, and reduce the waste I toss into the trash bin, and feed my plants, and keep the worms happy and alive. But since I also want to keep the bin indoors, and stay on good terms with my flat mate, I hope to manage to set up a bin that will run smoothly and not put off any bad odours. I added a layer of shredded newspaper on top of the worms and food scraps so hopefully things will stay moist but not stinky, and dry leaves too. I also have limited space, so that's another challenge. We will just have to learn as we go along- I will keep you posted!
 

Wednesday, November 28, 2012

A simple pasta

Last week I went up north to stay with dear friends for a quick break. They live on the foothills of the Carmel, overlooking the sea. They have a small vegetable garden, a welcoming array of pillows and covers for guests, open hearts and open doors, a table in the front yard which has, as mentioned, a perfect view of the sea, which at the right hour becomes a shimmering expanse of brightness.


Greeted upon arrival by numerous cats and the newly green nature surrounding their home, I turned to satiate a small but definite hunger. The rains which fell recently mean an abundance of young green things which grow wild on any spot, so I gathered a bunch of  young nettle leaves ( with a plastic bag on my hand! ) and wild mustard greens. The mustard greens are delectable, and extremely simple to come by in winter if you live around here. Gather the young tender leaves. Along with the nettles, which are said to be highly nutritious and  cleansing to the body, this made for a delicious, simple, light lunch. Rinse the greens well, warm a little olive oil in a skillet, toss  the clean greens in along with some salt and pepper, and cook just until wilted, stirring occasionally. That's it. I had this with a piece of dense, dark rye toast slathered with raw tehina. You could serve the greens as a side to any dish you please. They also like a squeeze of lemon juice right before you eat them and a bit of garlic quickly fried in the oil before they join the skillet. But the simple way works more than fine.


Since the purpose of the visit was Rest, and since I still wanted to cook something for my hosts and myself, Pasta seemed the choice of the hour. Preparation was kept simple and minimal, but some fine ingredients gave the dish a luxurious feel and comforting flavors. 


Fusilli with Scallions, Dried Tomatoes and Goat's Cheese

1 pckg Fusilli ( I used Tricolor )
1 cup ( about 1 small bunch ) of scallions, cut into pieces about 2 cm long
100 gr pine nuts
1 bunch arugula
125 gr dried tomatoes, sliced ( about a cup )
150-200 gr crumbly goat's cheese ( I used an Israeli type which was rather soft and crumbly with an ash coating. yum ), crumbled or grated 
about 1/4 of a cup olive oil

Set a large pot of salted water to boil. cook pasta till al dente. while the pasta cooks, warm about half the olive oil in a large skillet. Add scallions, dried tomatoes, and pine nuts. Season with salt and coarsely ground black pepper. cook very shortly. When the pasta is ready and drained, combine with the sauce, stir well and remove from heat. Wait till the pasta cools a bit, then add arugula and cheese. You could either eat this immediately, or let sit and eat at room temperature. In any case, don't add the arugula too soon so that the leaves will maintain some crispness and not become cooked by the heat of the pasta. This would probably be good cold, too.


Friday, November 16, 2012

Just do it.

Hello. It's been more than a while. If I wait any longer, I may never return to writing this blog. And it's not as if I haven't been thinking about it, on the contrary. But with all the time that has gone by, and all the events and moments and places and delicious things these past months have presented me with, I have started feeling as though when I finally sit down to write something here, it will have to be elaborate. It will have to be wow. And once I do it, I'll have to start doing the same once a day. Every day.

But a dear friend recently reminded me of baby steps., of the importance of letting go of disabling expectations and perfectionism, and just getting to it. So I will take her advice and waddle along here. There won't be many photos, and not too many words, but there will be soup, a lovely rich orange colored soup with Asian flavors, a spicy kick and a smooth creamy texture. And it's easy, too.


Pumpkin and Sweet Potato Soup with Coconut milk


1.5 kg pumpkin ( weight with peel ) peeled and cut into medium-small cubes
5 small sweet potatoes
6 cloves of garlic, chopped
1 hot green pepper- use as much or little as you like
1 stalk of lemon grass*
1 tbsp peeled chopped fresh ginger
1 can coconut milk*
a little oil, coconut or sunflower
 fresh lemon/lime juice
salt

To serve:
Cashew nuts, either lightly dry-pan roasted or not, chopped
fresh cilantro, chopped


In a large pot, warm oil over a medium flame. Add Garlic, diced hot pepper, ginger and lemon grass. Stir and cook for a few seconds- just till the mixture start giving off its scent. Add pumpkin and sweet potato cubes ( try and dice these in the same size, so they will cook evenly), cover and cook till vegetables become soft, stirring occasionally and taking care not to burn or brown the vegetables- this would make the soup a less bright and vibrant shade of orange, and you want it a beautiful orange. Cover with water, bring to boil and cook just till veggies are softened, not very long. Add coconut milk, cook for a few more minutes and remove from flame.Add a squeeze of lemon or lime juice and salt and let cool a little before removing lemon grass stalk and blending. Check seasoning and server with chopped cashew and cilantro.

* a few quick notes. If you are lucky and have a lemon grass bush growing in your yard or patio you can use fresh lemon grass, which can also be bought dry at Asian speciality shops and health food stores. You don't want the long green leaves, which you can set aside and use in tea, but the part just above ground, the base of the leaves, a white stalk about 8 cm long. from this stalk branch out several leaves. I cut the stalk I used into about two pieces before adding them to the pot.
Take a quick look at the ingredient list on the can of coconut milk and try to find one with no additives and preservatives. This is usually also a higher quality coconut milk, with higher fat percentages. Absolutely worth both the calories and the price.
Last note: this soup is delicious on the spicy side, so I wouldn't give up the hot pepper. That said, the pepper I used tricked me into believing that it wasn't that hot so I went ahead and threw the whole thing into the pot, seeds and all. Yikes. Adjust the amount of pepper you use according to just how spicy your particular pepper is and just how spicy you like your food. I used a green pepper, but I bet a red one would be just as nice.
Oh, and one more thing! you could trade the cashew-cilantro topping for roasted chopped peanuts and fresh scallions. Or you could mix and match. Good luck and happy cooking!


Have a warm, quiet, peaceful weekend, wherever you are.